

How To Add Image Texture In Maya
This chapter is from the book
Adding Texture Mapping to Base Materials
By now, you should take a basic understanding of how textures piece of work with the materials and how to place 2d textures on objects in your scene. In this next tutorial, you'll apply these methods to the business firm's base materials yous created and assigned in the earlier tutorial.
Tutorial: Texturing the Doorknob, Walls, and Windows
Having a solid color for the doorknob isn't as realistic equally it could be. Earlier yous learned how you can use a material's Diffuse aspect to create a dirty look, which is exactly what you'll do for the doorknob.
On the CD
Chapter_08\movies\ch08tut06.wmv
-
Outset, load your scene into Maya. You can continue from the previous house tutorial, or load the file noted below the CD icon.
On the CD
Chapter_08\ch08tut03end.mb
-
Showtime by changing the layout you're working with. If you haven't already done then, hide the UI elements, and alter to the saved layout for working with materials (Hotbox | Panels | Saved Layouts | Hypershade/Render/Persp).
-
Hibernate all the layers except DoorL. To begin, you'll modify the texture on the doorknob. Past adding a map to the Diffuse attribute, y'all can attain a worn metal look for the doorknob. Select the outer doorknob and focus on it (hotkey: f). IPR return the doorknob and select it for update in the Render View window.
-
In Hypershade, make certain the top and lesser tabs are visible (click the Show Top and Bottom Tabs button if they aren't). Double-click the DoorKnob_Blinn material to open the Attribute Editor and so that you can map a texture to the Diffuse attribute. Click the checkered button to the right of Lengthened to open up the Create Return Node dialog box. Under the 2D Textures section, brand sure the Normal radio push button is selected for placement, and click the Fractal type. The Attribute Editor switches to prove the Fractal attributes. Looking at the IPR render, you'll see that it has updated.
-
By changing settings for the procedural texture, you tin go a brushed effect on the doorknob; as you modify the settings, lookout man the IPR return to see how the texture is afflicted. Click the fractal1 tab in the Attribute Editor. Nether the Fractal Attributes section (run into Figure 8.24), alter Aamplitude to 0.5, Threshold to 0.1, Ratio to 0.77, and Frequency Ratio to 8. At present click the place2dTexture tab. Under the 2d Texture Placement Attributes section, change the 2nd text box (for V) to the right of Echo UV to 0.xv. Last, set up the Noise UV to 0 and 0.75. Adding this UV noise to the Fractal attribute "swirls" it more than. Shut the Attribute Editor.
 Figure 8.24 Using the Aspect Editor, IPR, and Hypershade, you can easily add textures to your materials.
-
Focus on the door, and redo the IPR render with more of the door in the view. Double-click Door_Blinn in Hypershade to open the Attribute Editor. Yous'll assign a texture to the Diffuse aspect just as you lot did with the doorknob, but this fourth dimension you'll create a Racket texture. To do that, in the noise1 tab, change the values under Solid Fractal Attributes (see Figure 8.25): Set Amplitude to 0.eight, Ratio to 0.35, Frequency Ratio to twenty, Depth Max to 3, and Noise Type to Wispy. In the place2dTexture tab, change the first text box for Echo UV to 4. Finally, hibernate DoorL because you take finished applying textures to it.
![]() Figure 8.25 Utilise these settings to change the Noise texture you just mapped to Door_Blinn's Diffuse attribute.
Figure 8.25 Utilise these settings to change the Noise texture you just mapped to Door_Blinn's Diffuse attribute.
-
Next, you'll add some texture to the walls. Display the OuterWallsL layer, and IPR render the walls so that you tin see them conspicuously. Open Walls_Blinn in the Attribute Editor, and change the Reflectivity to 0. Map a Noise texture (again confirming that Normal is selected at the meridian of the Create Render Node dialog box) to the Colour attribute of Walls_Blinn. Utilise the settings shown in Figure 8.26: Set Amplitude to 0.5, Ratio to 0.77, Frequency Ratio to ii, Depth Max to 20, Density to 5, Spottyness to 0.3, and Falloff to Bubble.
 Effigy 8.26 Settings to change the Noise texture mapped to the Color attribute for Walls_Blinn.
Maya provides a "colour residue" pick to easily adjust the effulgence and contrast of the racket. You'll use that now to darken and mute the noise effect:
-
Nether the Color Residual department for the Noise, set the Colour Gain in the Color Chooser (HSV: 41, 0.315, 0.656). Then change the Color Offset (HSV: 45.5, 0.393, 0.120). After setting those values, click the place2dTexture tab and gear up Echo UV to ane and 5 to make the texture compress in the V direction. Save your scene.
-
Select Walls_Blinn once more and map a 2D Mountain texture to the Diffuse attribute. In the place2dTexture tab, change the Repeat UV to 0 and 3 and set Noise UV to 0 and 0.005. Y'all should besides change the values in the mountain1 tab, as shown in Effigy 8.27: Amplitude to 0.75, Snow Altitude to 1, and Snowfall Dropoff to i.
 Figure eight.27 Settings for the Mountain texture mapped to the Diffuse attribute of Walls_Blinn.
-
Now y'all tin can move on to the foundation. Open up the Aspect Editor for Foundation_PhongE past double-clicking on the material in Hypershade. Y'all'll map an paradigm file to the Color aspect by clicking on the checker button for the Color attribute. The texture listing should appear. Select File. The Attribute Editor displays the file settings. We could now click the Folder button to select the image map by name, but there'due south an easier mode, shown in the next steps.
-
In HyperShade, choose Tabs | Create New Tab. In the Create New Tab dialog box, enter M4F maps in the New Tab Proper name text box, select the Bottom radio button for Initial Placement, select the Deejay radio button for Tab Type, and and so point the root directory to the Chapter_08\Textures folder on the CD-ROM (see Figure 8.28). Click the Create button.
![]() Figure 8.28 Adding a new tab to Hypershade.
Figure 8.28 Adding a new tab to Hypershade.
-
In Hypershade, click on the bottom tab Shader Library, and and then click the new tab you created. You should run into swatches appear for all the textures in the selected binder. These are thumbnail images of the available textures that you can zoom and pan. Click cobblestones.tif to select information technology, and then MMB-drag the texture to the Epitome Proper name text box in the Attribute Editor. The file'south location is automatically placed in the text box. Press Enter, and the Texture Sample swatch updates to evidence the new texture. If y'all exercise a test render, you'll see the fabric applied to the foundation, as in Figure 8.29.
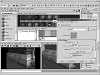 Figure viii.29 The cobblestones.tif texture has been linked to the File node.
-
Click the place2dTexture tab. Under the second Texture Placement Attributes section, modify Echo UV to 3 and 2. Click Foundation_PhongE again to open up information technology in the Attribute Editor. Map the 2D texture Noise to the Diffuse attribute, and in the noise3 tab, change the Solid Fractal Attributes to match Figure 8.thirty: Set Amplitude to 0.7, Ratio to 0.77, Frequency Ratio to 5, Depth Max to 2, Frequency to 10, and Racket Type to Perlin Racket. This adds a heavy "grime" layer to the texture. Raising the Threshold value will lighten the noise colour and therefore diminish the grime consequence.
-
Hide the OuterWallsL layer and display the ChimneyL layer. Zoom in on the chimney and IPR render. If you are having trouble seeing it because some areas are non illuminated enough, select spotLight2 in the Outliner and increase its Intensity to 1.two in the Channel Box.
 Figure 8.30 Placing this Noise texture on the Diffuse aspect gives the asphalt a very muddy await.
-
Click ChimneyBase_Lambert in Hypershade. In the Aspect Editor, map a File 2D texture node (the Normal radio button should be selected for placement) to the Colour attribute. Merely as you loaded the cobblestone texture for the foundation, in the Shader Library tab, locate bricks.tif and MMB-drag it to the Image Proper noun text box in the Attribute Editor.
-
The IPR updates, only the brick is stretched. To gear up that, RMB-click ChimneyBase_Lambert and choose Graph Network. Click the place2dTexture node for the brick. Under the 2d Texture Placement Attributes, modify the Repeat UV to 1 and 6. The brick looks too clean, so you'll add a Solid Fractal 3D Texture map to the material'southward Diffuse attribute. To practise that, in the place3dTexture tab, click the Fit to Grouping bbox button. Under the Solid Fractal Attributes section, alter the Amplitude to 0.8, Frequency Ratio to 5, Ripples to two, 3, and five, and Bias to 0.05.
-
In the Perspective view, rotate around. Notice that on two sides of the chimney, it seems as though the texture is moving in the wrong direction (meet Effigy 8.31). The surface'due south direction is going in the reverse management as the other sides of the chimney. In other words, the U and 5 coordinates have been switched, which is typical of NURBS cubes in Maya. To modify the direction of a surface, select the side of the chimney with the management problem, and reverse the surface direction (Alt+z | LMB-click | Reverse Surface Direction | option box). Make sure the Surface Direction is set to Swap. Click the Contrary button to see the texture magically repositioned in the Perspective view. You'll need to IPR render over again to see the modify. At that place are two sides of the chimney with this problem, and so repeat Step 17 on the opposite surface.
 Figure viii.31 Reversing the surface direction will gear up the texture mapping on the NURBS object in one step.
-
Before going any further, exist certain to save your scene. The final footstep is to add a texture to the Transparency attribute for your Window_Anisotropic cloth. Make all layers visible except for PorchL because the porch isn't anywhere almost the windows. You tin can do an IPR render of the window, but it won't show much without raytracing. In the Attribute Editor for Window_Anisotropic, map a second Texture Ramp (select the Normal radio button) to the Transparency attribute.
-
A Ramp texture can give you a wide range of effects. You lot tin can remember of it as a gradient, with i color blending into another. Click the ramp1 tab, and select Circular Ramp in the Blazon drop-down listing box (meet Effigy viii.32). The Texture Sample swatch updates to show what the Ramp looks like. You lot tin can specify the areas that will be transparent by setting a ramp colour (the circular color buttons) to white. The Interpolation list box, below Type, defines how the blending (intermediate) colors change; it should exist gear up to Linear.
![]() Figure 8.32 The default Ramp has been changed to a Round Ramp.
Figure 8.32 The default Ramp has been changed to a Round Ramp.
-
After modifying all the settings, you volition have a faded, more transparent await effectually the edges of the window. Using the IPR render can assistance you tweak the positions of the fading transparency. In the Aspect Editor for the Ramp texture, discover that three carve up colors are displayed by default. If y'all click anywhere in the Ramp, you create another color. To move the colors, click on the circles to the left; to delete the colors, click the modest squares on the opposite side. Click the green square to delete its color, and click the blue circumvolve to select it. Under this color swatch, set up Selected Color to almost completely blackness. Changed Selected Position to 0.810, U Wave to 0.150, Noise to 0.150, and Racket Freq to 0.600. Watch the IPR return update with each modify. Change the other color in the ramp to pure white by clicking the red circle and setting Selected Color to white. Alter Selected Position to 0.415. Your Ramp settings should now resemble Figure 8.33. Don't forget to salve your scene.
![]() Figure 8.33 The Ramp texture has been gear up for the window glass.
Figure 8.33 The Ramp texture has been gear up for the window glass.
At this point, you lot can continue on your own to apply textures to the rest of the house. You have walked through applying textures for the walls, chimney, door, and glass. The next department of this chapter introduces yet another important attribute for materials—bump mapping.
On the CD
Chapter_08\ch08tut06end.mb

How To Add Image Texture In Maya,
Source: https://www.peachpit.com/articles/article.aspx?p=31330&seqNum=8
Posted by: baileyolonstake.blogspot.com
0 Response to "How To Add Image Texture In Maya"
Post a Comment